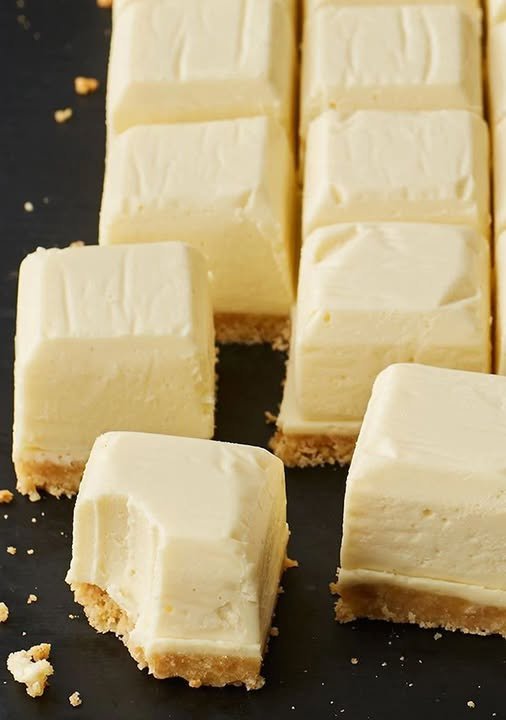
Milkybar Cheesecake Recipe (Creamy, No-Bake Delight)
If you’re a fan of smooth white chocolate and rich, velvety desserts, this Milky bar Cheesecake is going to become your new favourite indulgence. Combining the nostalgic sweetness of Milky bar with the luxurious texture of cheesecake, this dessert is perfect for special occasions, family gatherings, or simply when you want to treat yourself to something extraordinary.
This recipe is designed to be easy yet impressive. It requires no baking, making it ideal for beginners and experienced bakers alike. With a buttery biscuit base, a creamy Milky bar-infused filling, and a silky topping, every bite melts in your mouth.
Ingredients
For the Biscuit Base:
- 250g digestive biscuits (or graham crackers)
- 120g unsalted butter (melted)
For the Cheesecake Filling:
- 400g cream cheese (room temperature)
- 300ml heavy whipping cream (chilled)
- 200g Milkybar white chocolate (melted and slightly cooled)
- 100g powdered sugar
- 1 teaspoon vanilla extract
For the Topping:
- 100g Milkybar chocolate (for decoration)
- White chocolate curls or shavings (optional)
- Fresh berries (optional, for contrast)
Step-by-Step Instructions
Step 1: Prepare the Base
Start by crushing the digestive biscuits into fine crumbs. You can do this using a food processor or by placing them in a ziplock bag and crushing them with a rolling pin. The texture should resemble fine sand without large chunks.
Transfer the crumbs into a mixing bowl and pour in the melted butter. Mix thoroughly until all the crumbs are coated and the mixture resembles wet sand.
Press this mixture firmly into the base of a springform pan (8 or 9 inches works best). Use the back of a spoon or a flat-bottomed glass to smooth and compact the base evenly.
Place the base in the refrigerator for at least 30 minutes to set.
Step 2: Melt the Milky bar
Break the Milkybar chocolate into small pieces and melt it gently. You can use a microwave (in 20-second intervals, stirring in between) or a double boiler method.
Once melted, set it aside and allow it to cool slightly. It should still be pourable but not hot, as excessive heat can affect the cream cheese mixture.
Step 3: Prepare the Cheesecake Filling
In a large mixing bowl, beat the cream cheese until it becomes smooth and creamy. This step is important to avoid lumps in your cheesecake.
Add the powdered sugar and vanilla extract, and continue mixing until fully combined.
In a separate bowl, whip the chilled heavy cream until soft peaks form. Be careful not to overwhip; the cream should be light and fluffy.
Now gently fold the whipped cream into the cream cheese mixture. Use a spatula and fold slowly to maintain the airy texture.
Finally, pour in the melted Milkybar chocolate and fold everything together until smooth and well combined.
Step 4: Assemble the Cheesecake
Take the chilled biscuit base out of the refrigerator. Pour the cheesecake filling over the base and spread it evenly using a spatula.
Smooth the top carefully to give it a clean, professional look.
Tap the pan gently on the counter to remove any air bubbles.
Step 5: Chill the Cheesecake
Place the assembled cheesecake in the refrigerator for at least 6–8 hours, or preferably overnight. This allows the filling to set properly and develop its rich texture.
Avoid rushing this step, as proper chilling is key to achieving the perfect consistency.
Step 6: Decorate and Serve
Once the cheesecake is fully set, carefully remove it from the springform pan.
Decorate the top with grated or shaved Milkybar chocolate. You can also add white chocolate curls, drizzle melted chocolate, or place fresh berries for a pop of color and slight tartness.
Slice using a sharp knife (dip it in warm water and wipe clean between cuts for neat slices).
Serve chilled and enjoy every creamy, dreamy bite.
Tips for Perfect Milkybar Cheesecake
- Room Temperature Ingredients: Make sure the cream cheese is at room temperature to ensure a smooth mixture without lumps.
- Chill Time Matters: The longer you chill the cheesecake, the better it sets and tastes.
- Don’t Overmix: Overmixing can deflate the whipped cream and make the filling dense instead of light.
- Use Good Quality Chocolate: Since Milkybar is the star ingredient, its quality directly affects the flavor.
- Clean Slices: For bakery-style slices, always clean your knife between cuts.
Variations You Can Try
1. Milkybar Oreo Cheesecake
Add crushed Oreo biscuits into the filling or use them as a base instead of digestive biscuits for a cookies-and-cream twist.
2. Milkybar Strawberry Cheesecake
Add a layer of strawberry compote on top or swirl it into the filling for a fruity contrast.
3. Baked Version
If you prefer a baked cheesecake, you can adapt this recipe by adding eggs and baking it at a low temperature. However, the no-bake version keeps the Milkybar flavor more delicate and creamy.
4. Mini Cheesecakes
Use cupcake liners or mini molds to create individual servings—perfect for parties and events.
Storage Instructions
Store the cheesecake in the refrigerator in an airtight container. It will stay fresh for up to 3–4 days.
If you want to store it longer, you can freeze it (without toppings) for up to 1 month. Thaw overnight in the refrigerator before serving.
Why You’ll Love This Recipe
This Milkybar Cheesecake is:
- No-bake and beginner-friendly
- Rich, creamy, and indulgent
- Perfect for any occasion
- Customizable with different toppings and flavors
The smooth white chocolate blends beautifully with the tangy cream cheese, creating a balanced flavor that isn’t overly sweet. The buttery biscuit base adds the perfect crunch, making every bite satisfying.
Final Thoughts
Whether you’re making dessert for guests or simply craving something luxurious, this Milkybar Cheesecake delivers both flavor and elegance. Its creamy texture, sweet white chocolate notes, and beautiful presentation make it a standout dessert for any table.
Take your time with each step, especially the chilling process, and you’ll end up with a cheesecake that looks and tastes like it came straight from a professional bakery.
Enjoy your homemade Milkybar Cheesecake—and don’t be surprised if it becomes a regular favorite in your kitchen!